Download and install Anaconda
Download Deoldify code from github
https://github.com/jantic/DeOldify
Extract contents of the downloaded DeOldify code zip file to a folder.
Download Completed Generator Weights file for Video from the DeOldify github page (834 MB size)
In the root of DeOldify folder create a new folder named “models” and copy downloaded Completed Generator Weights file to this folder (ColorizeVideo_gen.pth)
Now launch Anaconda Powershell and go to root of DeOldify folder.
Now we need to run few commands in sequence.
Run following command first which will take a while to finish
conda env create -f environment.ymlOnce above command finished, run the next command as following
conda activate deoldifyNow run the following command
jupyter labNote: In case you face issues with running jypyter command such as “cmdlet not found”, check the path of python library in the system PATH variable. Also, make sure jypyter is installed on your system. You can install jupyter using windows command prompt as following
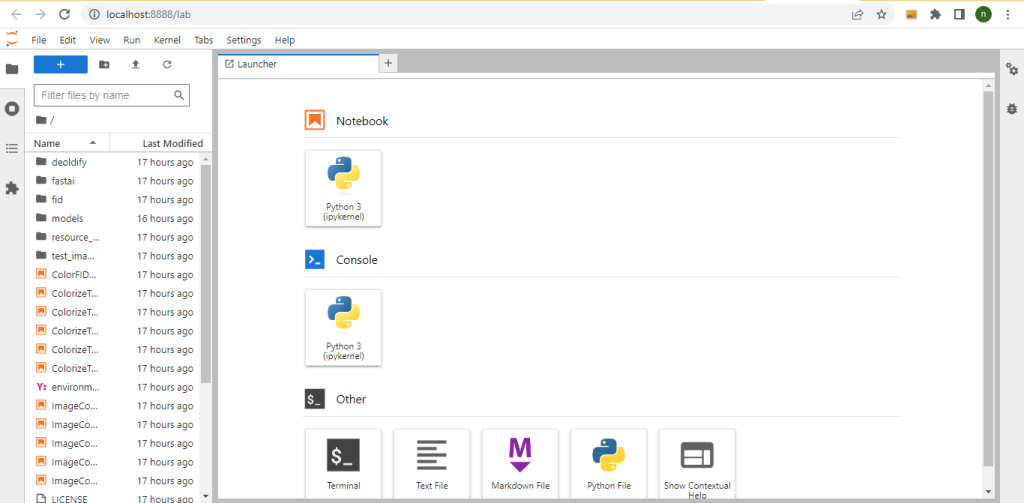
pip install jupyterRunning jupyter lab command will launch in browser as shown in the screenshot below

Click Python 3 tab under notebook which will open up in a new tab. We will run all all code in this window. Make sure left hand side pane is diplaying content of the root of Deoldify folder. If not, then navigate to it.
Go to the URL below (you can also navigate to this URL from DeOldify github page)
https://colab.research.google.com/github/jantic/DeOldify/blob/master/VideoColorizerColab.ipynb
Scroll down to Setup section which lists down a sequence of code which should be run from your local Colab. When running code in Colab, if you face issues with any module, install it locally in Colab using conda. You can also install ffmpeg if you get error such as “ffmpeg is not installed” using the following command
conda install ffmpeg
In your local colab, run following commands. (Change some of the parameters accordingly such as video URL etc)
from deoldify import device
from deoldify.device_id import DeviceId
#choices:  CPU, GPU0...GPU7
device.set(device=DeviceId.CPU)

import torch

if not torch.cuda.is_available():
    print('GPU not available.')

from os import path

!pip install -r requirements-colab.txt

import fastai
from deoldify.visualize import *
from pathlib import Path
torch.backends.cudnn.benchmark=True
import warnings
warnings.filterwarnings("ignore", category=UserWarning, message=".*?Your .*? set is empty.*?")

colorizer = get_video_colorizer()


source_url = 'https://youtu.be/7LE4FkucN9w' #@param {type:"string"}
render_factor = 21  #@param {type: "slider", min: 5, max: 40}
watermarked = True #@param {type:"boolean"}

if source_url is not None and source_url !='':
    video_path = colorizer.colorize_from_url(source_url, 'video.mp4', render_factor, watermarked=watermarked)
    show_video_in_notebook(video_path)
else:
    print('Provide a video url and try again.')
Once the process finishes, check your video in the “video/result” folder.
