Let’s Encrypt is a free, automated, and open certificate authority brought to the people by the nonprofit Internet Security Research Group (ISRG) which provides people the digital certificates they need in order to enable HTTPS (SSL/TLS) for websites, for free, which otherwise requires considerable investment if it was to be bought from the paid SSL providers. The only downside being the need of renewing the certificate every 90 days. Though majority of hosting providers now offer it as part of their hosting services, some hosting providers like GoDaddy still have not provided any in-built support in their hosting solution instead offering its own paid SSL certificates. If we are using shared hosting, then we can manually install Let’s Encrypt certificates on GoDaddy websites. Let’s Encrypt provides client tools which can be installed on the web servers to automate installation and renewal of SSL certificates but in case of shared hosting, we don’t have access to the server to do all that.
Afosto wrote a package in PHP which aimed to simplify and decouple Let’s Encrypt client, based on ACME V2. Now anybody can create a production certificate online without having a need to install a Let’s Encrypt client like Certbot on the web server.
https://github.com/afosto/yaac
Many developers have now hosted that package to provide a web link to generate Let’s Encrypt SSL certificates. We will use one such service (PunchSalad) to generate our SSL certificate
Click the link to open the site
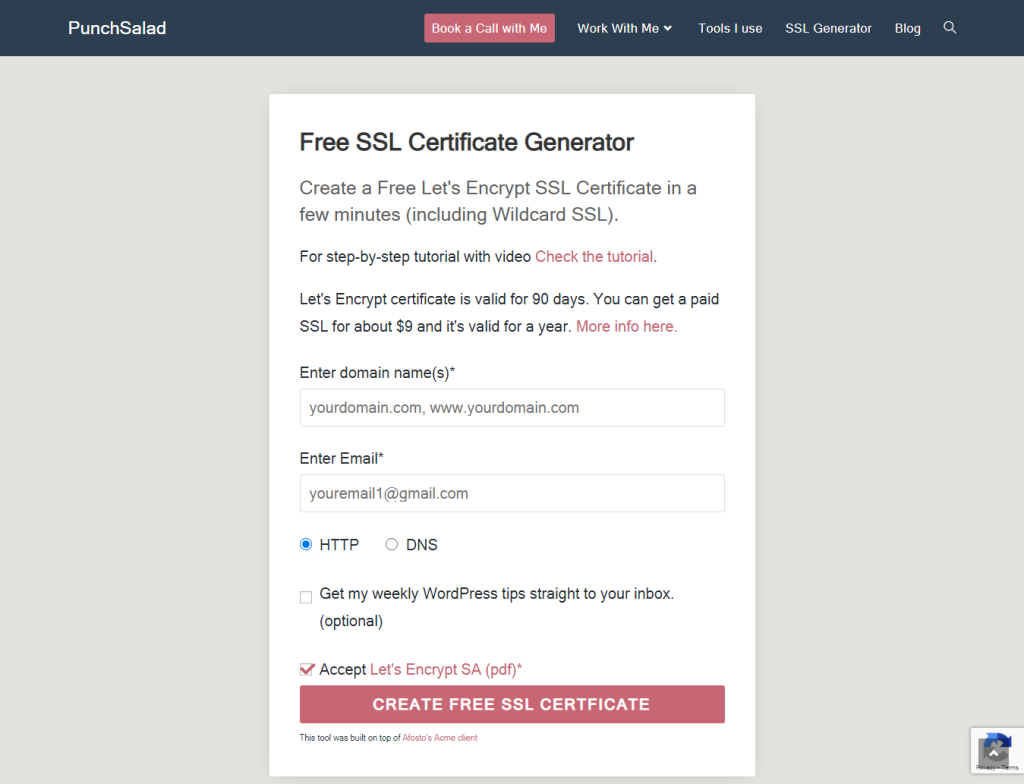
As you see, we need to enter domain names separated by a comma so if you have a website such as netexl.com and you use www url for the site as well, you can simply enter
netexl.com, www.netexl.comEnter your email address which will be used for sending a notification prior to expiration of the SSL certificate (which is 90 days from the date of generating certificate). We will keep HTTP selected (which is the mode for verifying our domain ownership) and also select “Accept Let’s Encrypt Subscriber Agreement” if not already selected. Then click on “CLICK FREE SSL CERTIFICATE” button to start the process which will take us to the next step where we need to prove ownership of the domain.
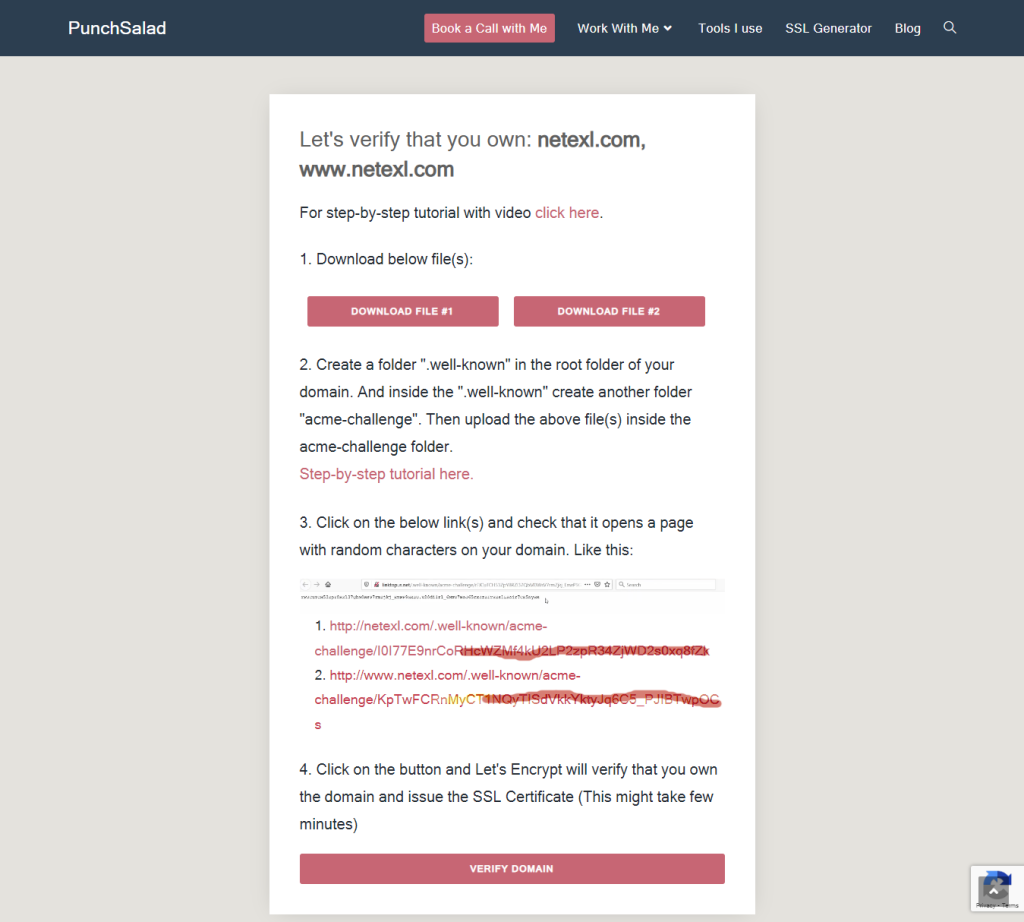
We will see 2 download buttons. Click and donwload both files and now we will ftp to the root directory of our website where we are going to create two folders “.well-known” and “acme-challenge” as instructed. We will upload both files to “acme-directory”. After uploading the files, click on the two links to make sure the files are accessible. Now click on “VERIFY DOMAIN” button which might take a few mins to run and generate certificates. You will be automatically redirected to the next page which will show the generated certificates.
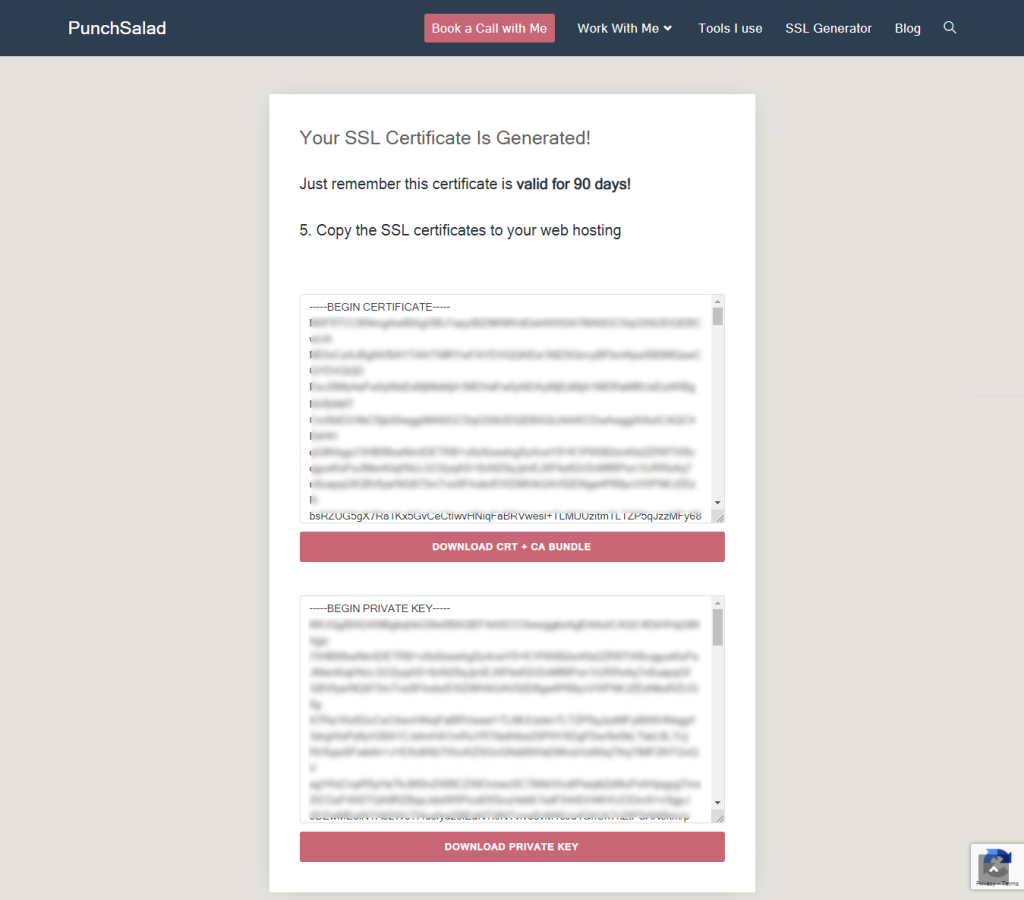
Download the two certificates (CRT + CA Bundle, Private Key). Now we need to login to “GoDaddy Plesk Admin” where we are going to install these certificates.
Go to “Websites and Domains” -> “SSL/TLS Certificates” under your domain -> Add SSL/TLS Certificates
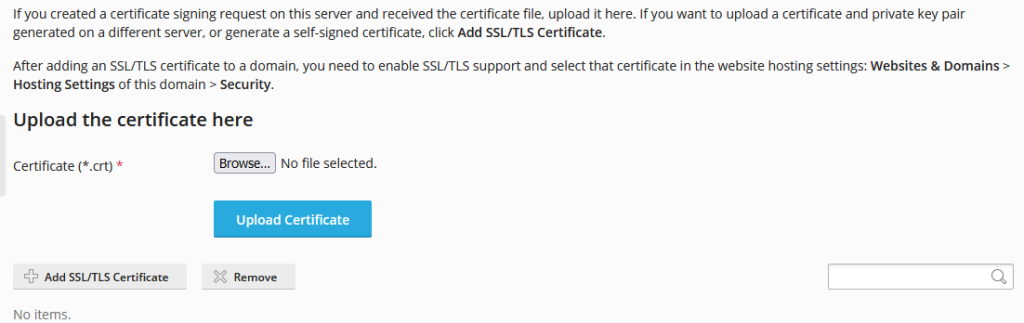
Clicking “Add SSL/TLS Certificate” here will take us to a form where we need to fill some details and upload certificates.
Fill all required details and upload certificate files. There are two options to upload certificates. One is to upload the files and second one is to copy the content of the certificate files as text. We will upload certificate files in text format here.
Open “Private Key” file which we downloaded and paste it in the “Private key” box here.
Now open “CA Bundle” file and copy first section which starts with the “BEGIN CERTIFICATE” and ends with the “END CERTIFICATE” in the “Certificate (*.crt)” box.
After that remaining two sections starting with the “BEGIN CERTIFICATE” and ending with the “END CERTIFICATE” should be copied in the “CA certificate (*-ca.crt)” box. Click “Upload Certificate” button to finish uploading this certificate.
Once certificates are uploaded, go back to WebSites and Domains -> Hosting Settings -> Security for the website. Make sure to select “SSL/TLS Support”and “Permanent SEO-Safe 301 redirect from HTTP to HTTPS”. In the certficate dropdown, we will select the SLL we just uploaded.

Select the SSL we just created for the website and click “Apply” button at the bottom.
Now try to open your website with https in stead of http and it should open.