If you have made an HTML5 game and have compiled the game to an APK using Cordova and now want to add Play Games Services to your app to use Leaderboard and Achievements from Play Games Services, you need to follow a set of steps to make it work.
If you want to learn how to use cordova to compile HTML5 game to an APK and publish to the Google Play Store, follow the steps @
https://www.netexl.com/blog/use-cordova-to-compile-html5-games-to-android-app/
Assuming that we have installed all tools for cordova on our system and can compile the game to the APK, we will follow next steps for the Play Games Services integration. First we need to find a cordova plugin which integrates the Play Game Services API and add it to our project. Go to NPM and search for the latest plugin for the Play Game Services integration.
If you have not already created a game app in Google Play Console, then first create one for the game.
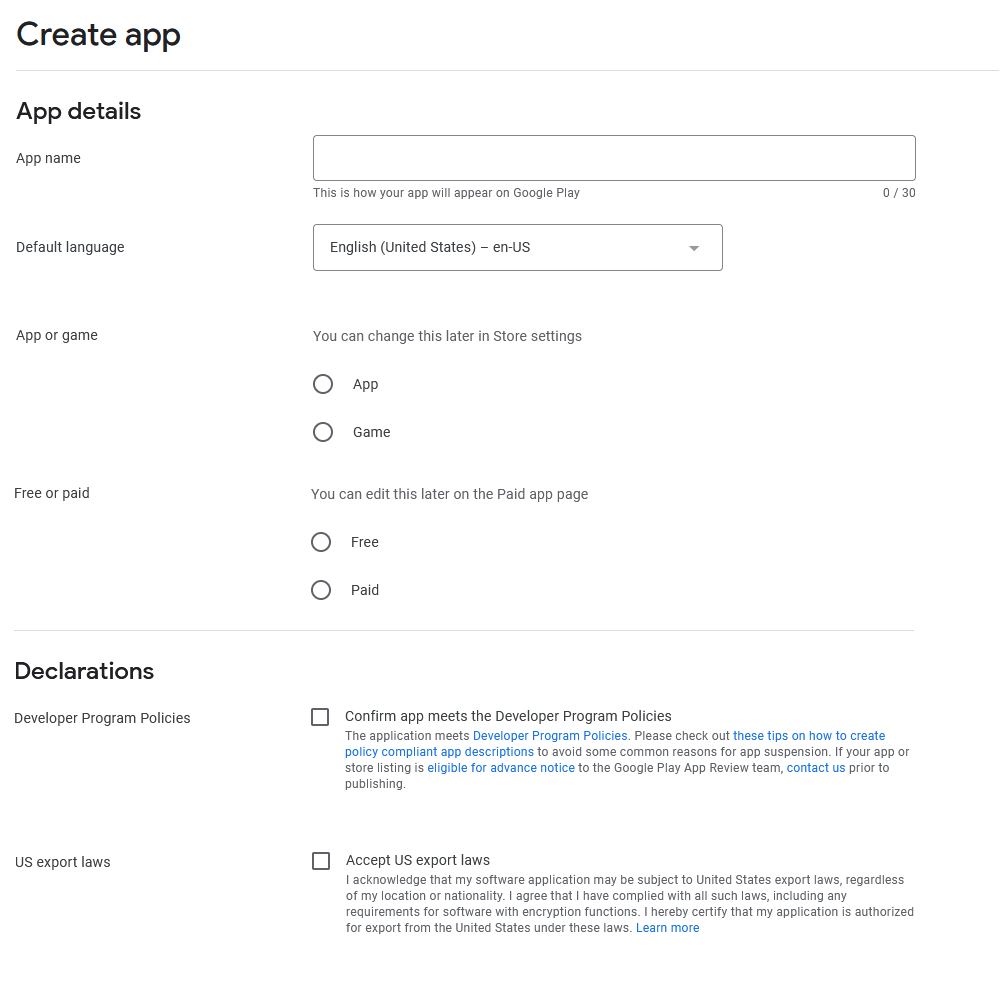
After creating the app in the Google Play Console, let us jump to the setup and configuration of the Play Game Services section of the app we created for the game in the Google Play Console.

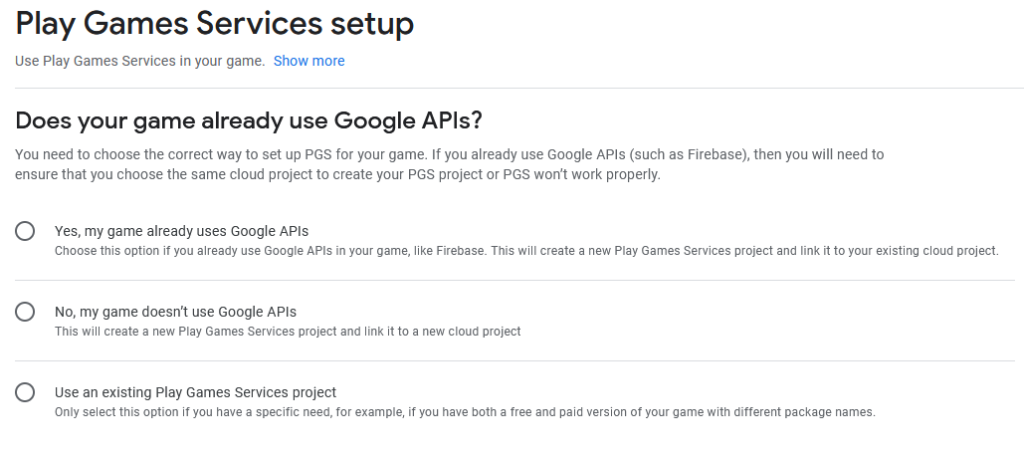
On the Configuration page, we will select “No, my game doesn’t use Google APIs” and click “Create” which will create a new cloud project for our game in the Google Cloud Platform.
Now we are into the next step of the Play Games Services configuration which will tell us next set of steps we need to follow to configure. We will follow these steps one by one.
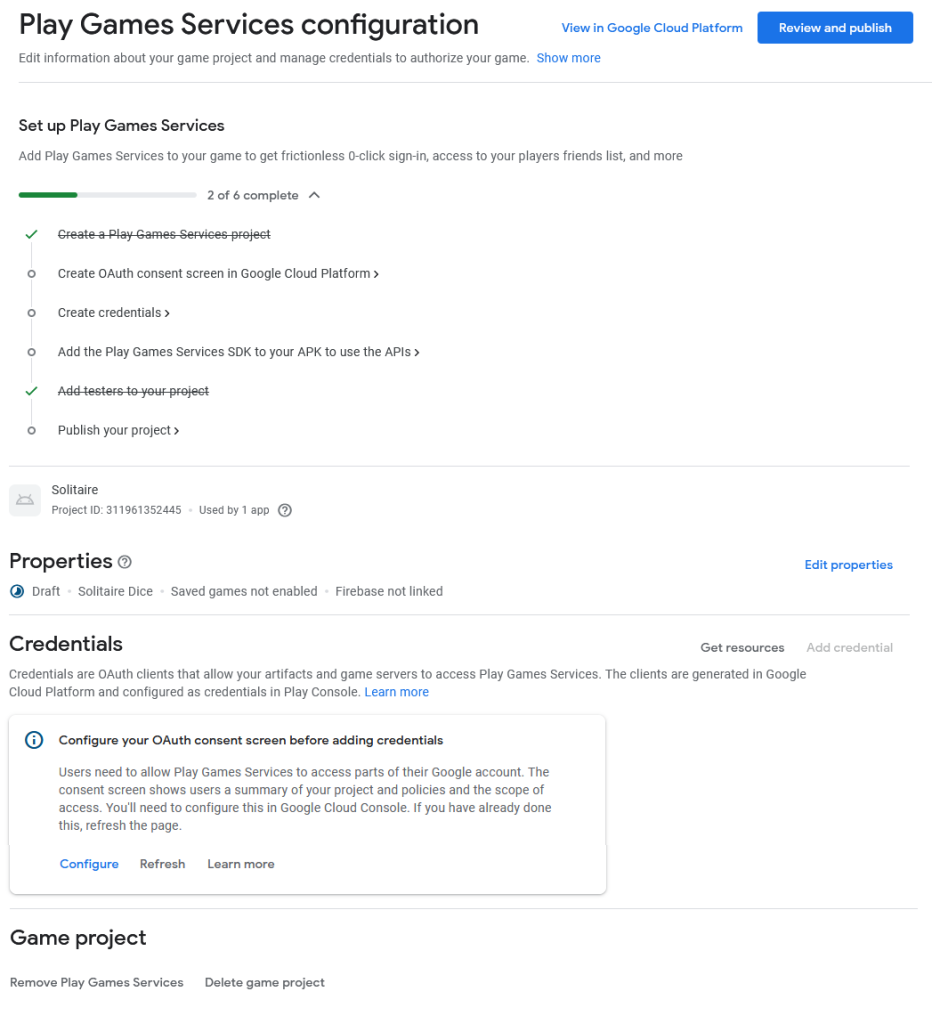
We will start with “Edit properties” and fill in other app details such as enable/disable “Saved games”.
Further let us go to the “Create OAuth consent screen in Google Cloud Platform” which will present a popup with some details. Click “Confirm Configration”.
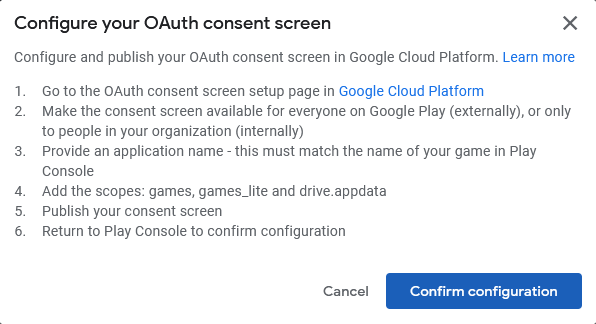
If “Confirm Configuration” does not take you to the next page, simply click on “View in Google Cloud Platform” link up top on the right hand side of the configuration page which shall open the app page created in the Google Cloud Console as following
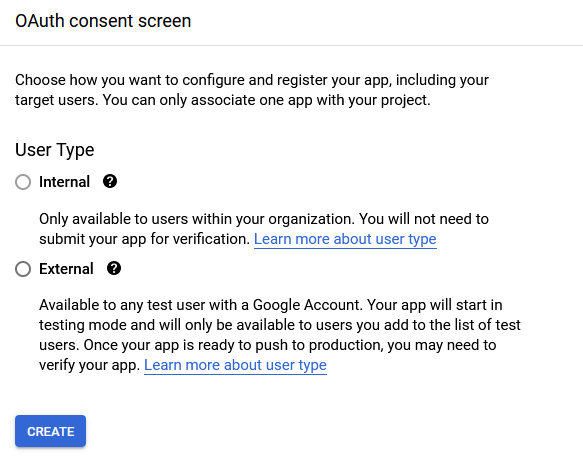
We will select “External” and click “Create” on OAuth consent screen. On next screen we need to enter app related details and save it. Add “Test users” to test the app before publishing it.
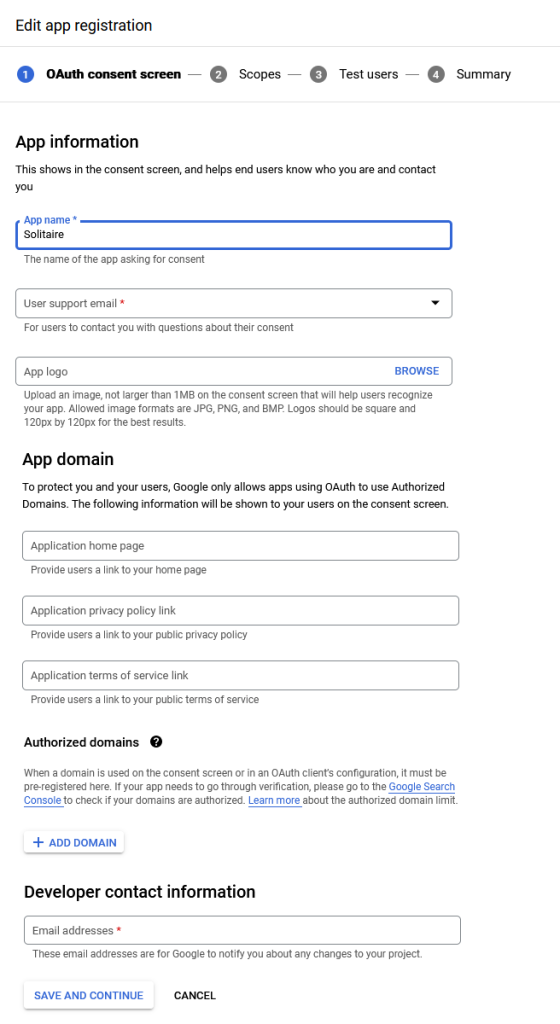
Fill out all mandatory details and hit save. You will be adding basic details, scopes, test users etc here. For scope we will select “Google Play Games Services” to “Create, edit, and delete your Google Play Games activity”. Once OAuth consen screen is created, we will go to the “Credentials” sections and create OAuth 2.0 Client IDs.
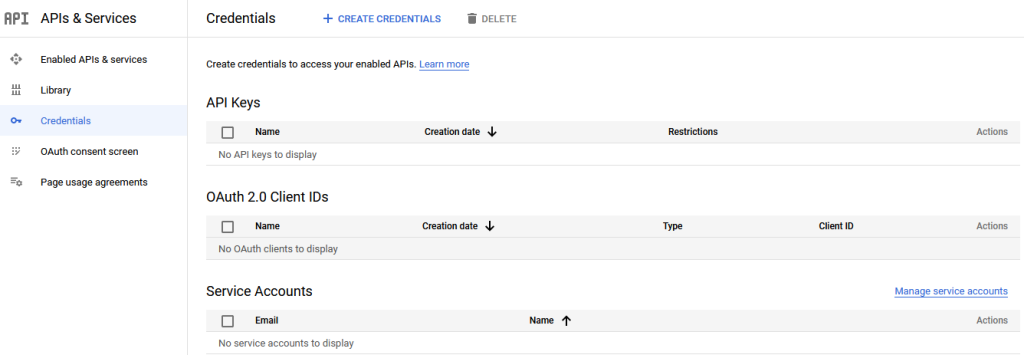
Create Credentials
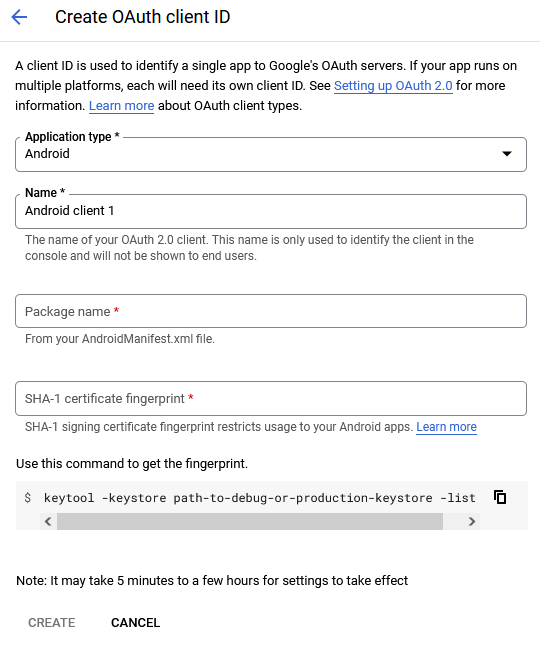
Here an important point to note is that we need to enter SHA-1 certificate fingerprint so that the usage of the API can be limited to our Android app only. The page specifies a keytool command to create this certificate. We will create one for debugging purpose and another for production. For debgging purpose we must use debug keystore on our system (C:\Users\<user name>\.android\debug.keystore). Run following command in the command prompt to get the key
keytool -keystore C:\Users\<username>\.android\debug.keystore -list
keytool application can be found in %JAVA_HOME%\bin directory in case you get error and system is not recognizing keytool command. When you enter the command, it will ask for the password. debg keystore normally does not have a password so just hit enter without entering any password. For production use the password of your keystore.
After running the command you will see the results on the command prompt screen, copy SHA1 key from there and paste it into the SHA1 certificate fingerprint section on “OAuth Client ID” creation screen. Hit “Create”. On succeussful creation of the key, we will get a popup confirmation. Copy Client ID from there.
Now we will go back to Google Play Console and Add credential there
Add Credential -> Type: Android -> Select your debug key in OAuth Client -> Save Changes.
When we ready, we will follow same steps to add production key here.
Now we are through with the configuration on the the Google Play Console and the Google Cloud Console. We will now move to our local development system and integrate a Cordova Google Play Service Plugin in our code and write some code to make calls to the play services api.
Searching on NPM gave me following plugin
https://github.com/artberri/cordova-plugin-play-games-services
but when I imported this plugin in my cordova project and compiled, it failed to compile saying it could not identify certain objects. This was because the latest Google Play Services had removed some of the classes from its library which were being mentioned in the plugin code. I had two options. Either make my corodva project refer to an old play services libraries and compile, or fix the code to remove deprecated api calls. Since apis are continuously being updated with every new release and old libs being deprecated, the safer option would be to point to the latest lib so I forked the project to my personal github space
https://github.com/ngdevr/cordova-plugin-play-games-services
Removed all unwanted code from it and used that in my cordova project.
Create a “plugins” folder on your local system. Open command prompt and go to the plugins folder in the command prompt. Simply run the following command to make a clone of the git repository on your local system
git clone https://github.com/ngdevr/cordova-plugin-play-games-services.gitWhen adding the plugin to our cordova project, we will refer to the locally downloaded plugin folder in stead of the git url such as
cordova plugin add "C:\Projects\Plugins\cordova-plugin-play-games-services\plugin" --variable APP_ID=3xxxxxxxxxx5Make sure to correctly specify the APP_ID here. The APP_ID can be found from your app in the Google Play Console -> Configuration page. It should be all digits and can be found just below the project name on the configuration page. The further steps on how to make api calls from your cordova project can be found on the cordova plugin github page.
Reference Links:
https://developers.google.com/games/services/console/enabling